Help Center
OBS Slow Motion
Overview
This article will walk you through the steps to enable slow motion replay within OBS. Thank you to HTDumps for the assistance in putting this article together. This is very useful for swing analysis and online lessons. These steps include:
- Downloading an installing the OBS Replay Source add-in
- Configuring a microphone to trigger the replay capture when you hit the ball
- Configuring video input(s) to capture your swing
- Configuring video replay(s) of your swing
The prerequisites are:
- OBS installed and configured to record
- Latest version should work
- USB Camera (preferably 120 frames-per-second or higher)
- Recommended Kayeton Monochrome camera with no IR filter: https://www.amazon.com/gp/product/B07Q35V5NP/ref=ppx_yo_dt_b_search_asin_title?ie=UTF8&psc=1
- This camera works very well in low-light settings which are often required for projectors to look good.
- If you are close to a wall with the Face-On (FO) camera, you can use a fisheye lens. It will add a little distortion, but you will be able to see your entire swing. The below camera is ~50 inches from the ball in the below setup: https://www.amazon.com/gp/product/B07Q2ZSQSM/ref=ppx_yo_dt_b_search_asin_title?ie=UTF8&psc=1
- Other lens are available for different focal lengths from Amazon
- Audio input
- Any USB conference room microphone should suffice
- USB Cables
- If you need an extension cable, use an active extension cable to avoid data transmission errors.
- Article on what active vs passive USB cable is: https://www.cablematters.com/Blog/USB-C/active-usb-extension-cable
Download and Install OBS Replay Source Add-In
- Download the OBS Replay Source add-in from https://github.com/exeldro/obs-replay-source/releases .
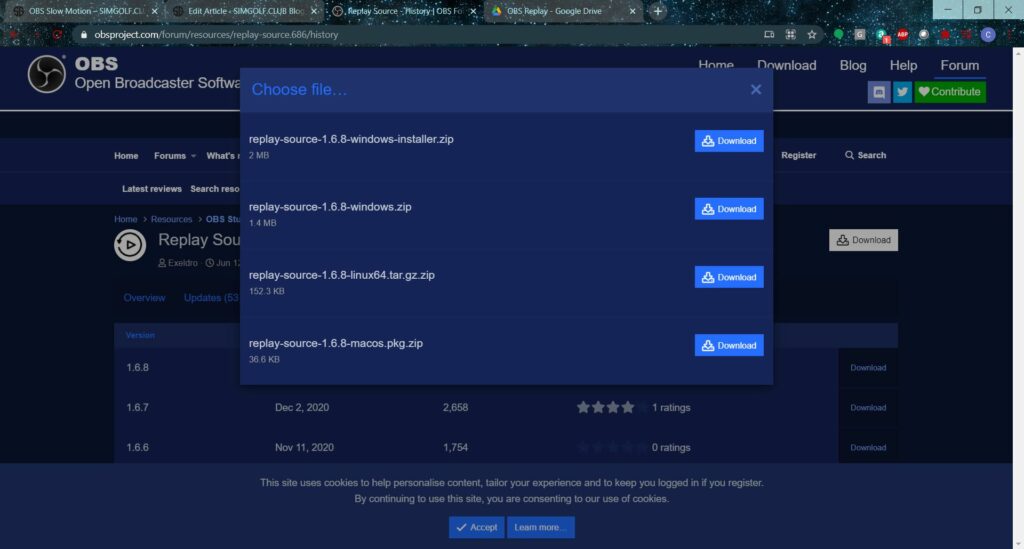
- Click Download on the right hand side.
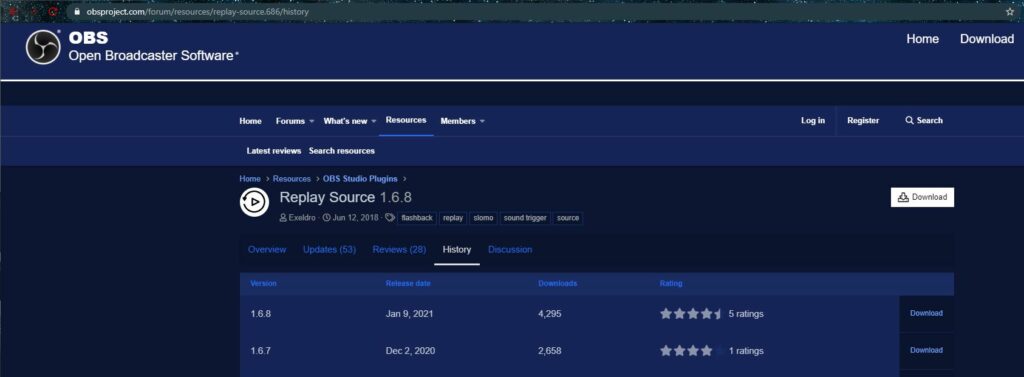
- Select the replay-source-1.6.8-windows-in staller.zip (1st option) to download.
- Open the downloaded zip file and run the installer.

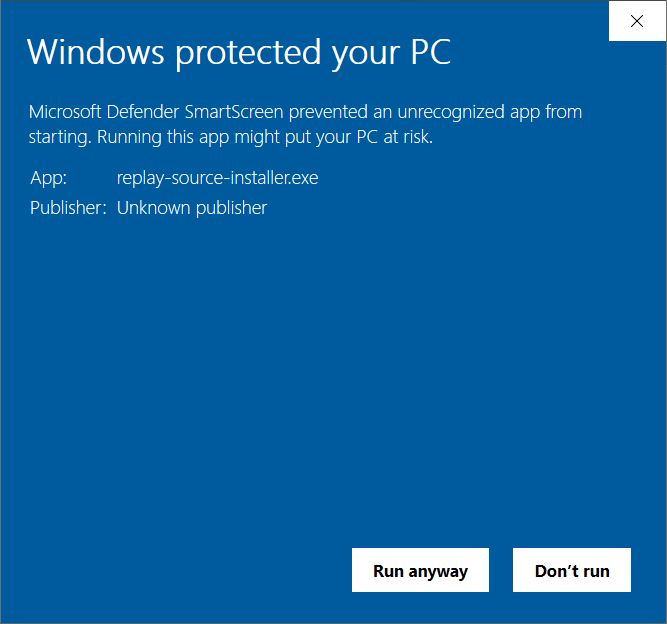
- A window will pop up warning about Microsoft Defender. Click More info.
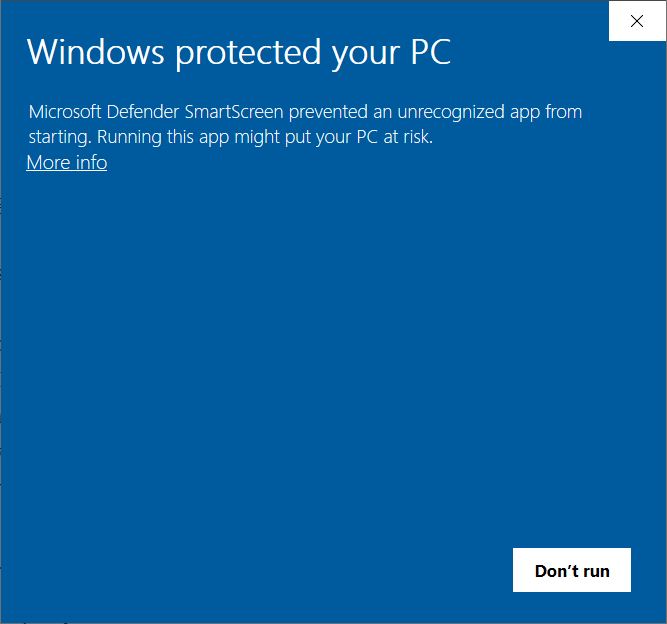
- Click Run anyway
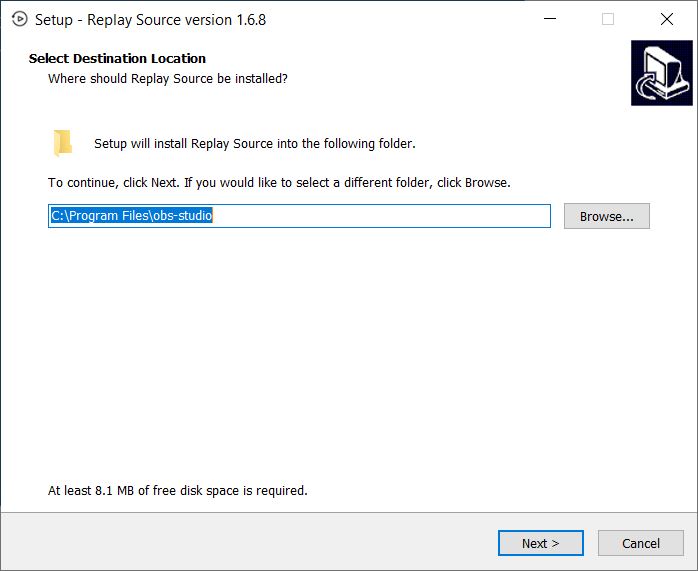
- Select the file location to install the new SW and click Next. This should be the location where OBS studio is installed on your computer. Most people will have just used the default.
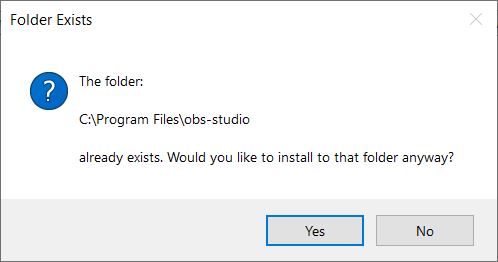
- A warning will pop up that the folder already exists. Click Yes to continue.
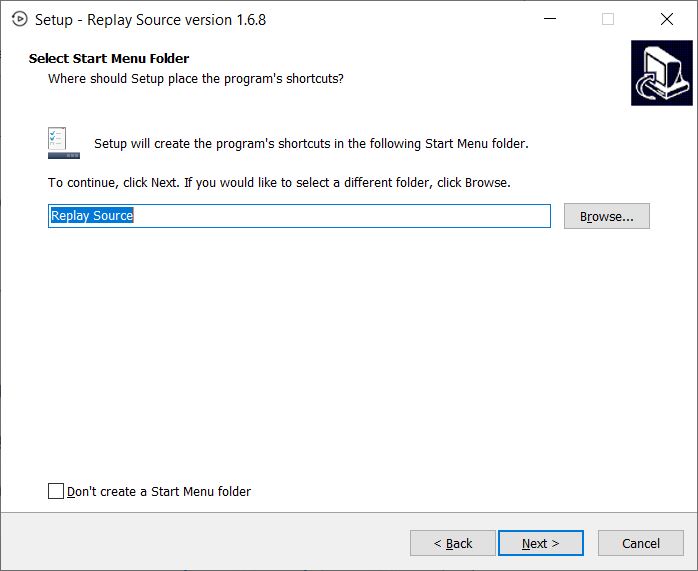
- Select if you want a Start menu folder created or not and click Next.
- Click Install

- Click Finish to complete the installation.

Configure OBS
- Launch OBS and create a new scene (I used Slo Mo Instructions for this article).
- If your camera has a built in microphone, you can skip the steps to add the mic and then select the camera mic in later steps. most cheaper high-speed cameras don’t have mics.
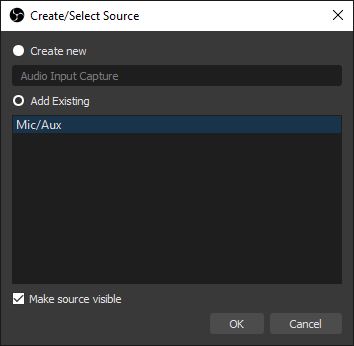
- Under sources, click the + icon and then select Audio Input Capture (top item) to create or add a microphone input.
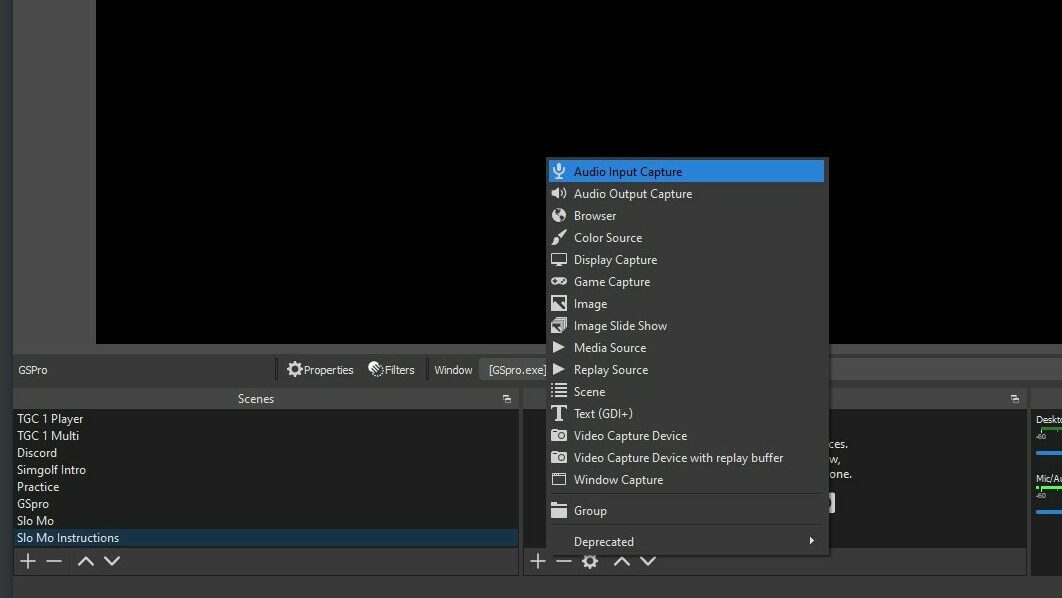
- Create a new input or select a pre-existing mic and click OK. If you are already using OBS, you probably already have a mic input configured.
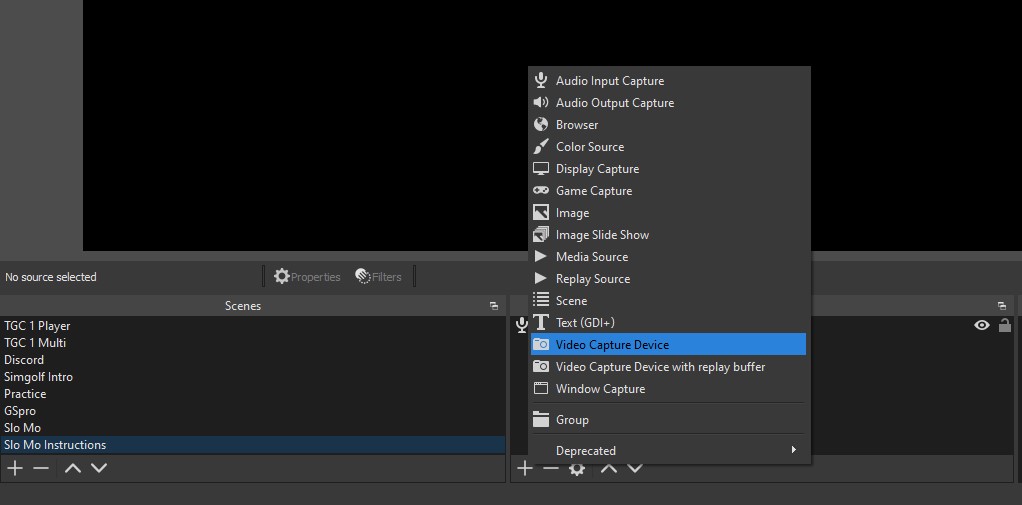
- Under sources, click the + icon and select Video Capture Device.
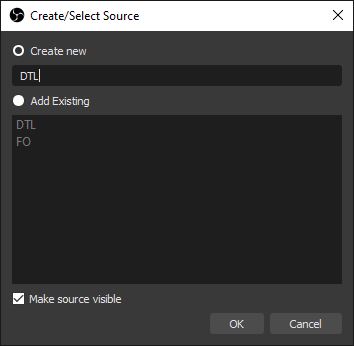
- Create a new video capture device (I used DTL for this example) and click OK.
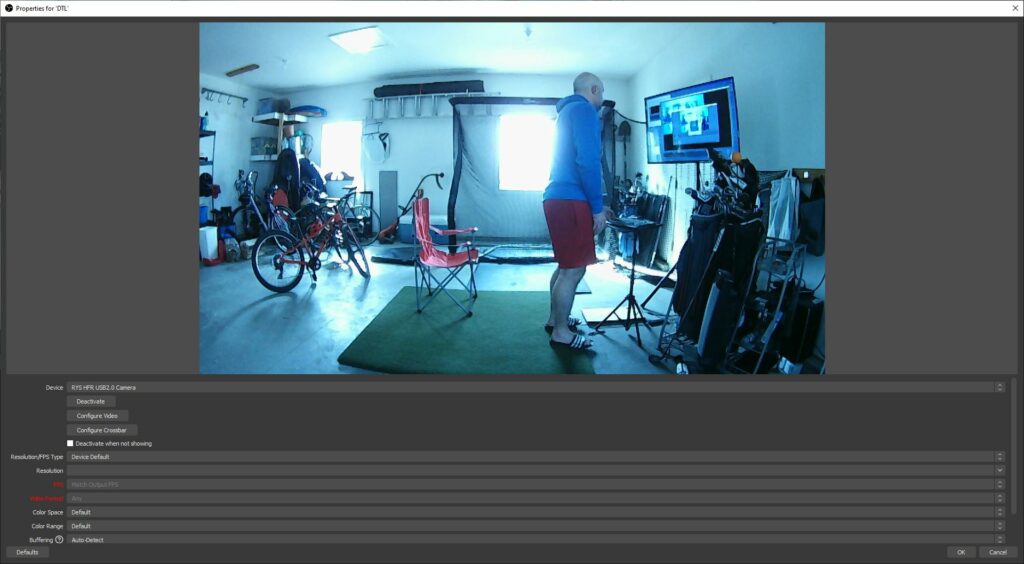
- Configure the video input device and then click OK.
- Device – Select the camera you want to use from the dropdown.
- Resolution/FPS Type – Device Default
- Resolution – (blank)
- Video Format – Any
- Color Space – Default
- Color Range – Default
- Buffering – Auto Detect
- Flip Vertically – Unchecked
- Audio Output Mode – Capture audio only
- Audio Output Mode – Capture audio only
- The video input should appear in the scene layout.
- Under Sources, click the + icon and select Replay Source
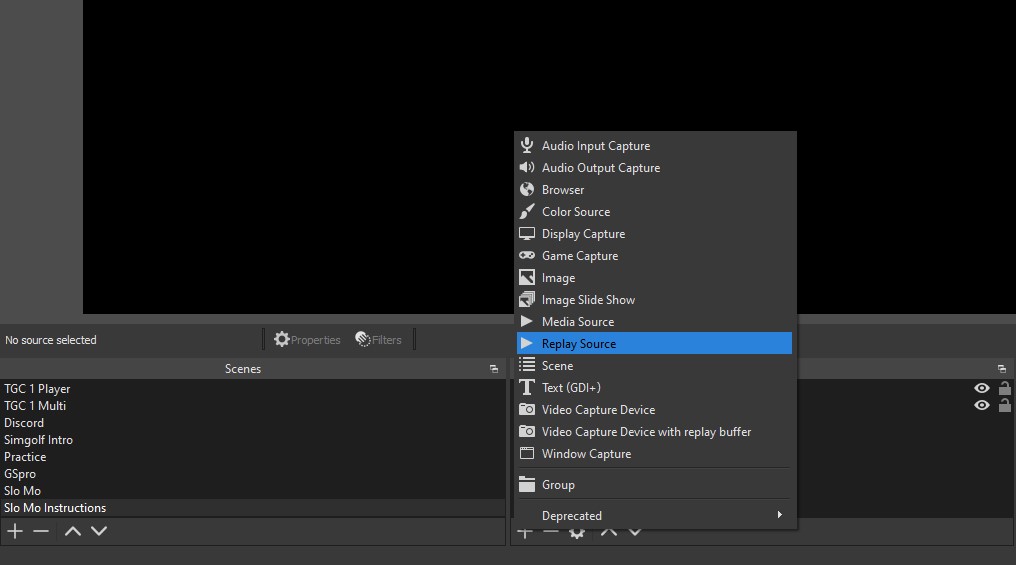
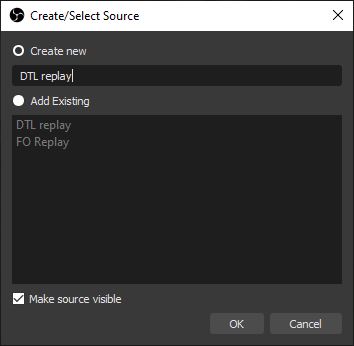
- Create a name for the replay source and click OK. I used DTL replay for this example.
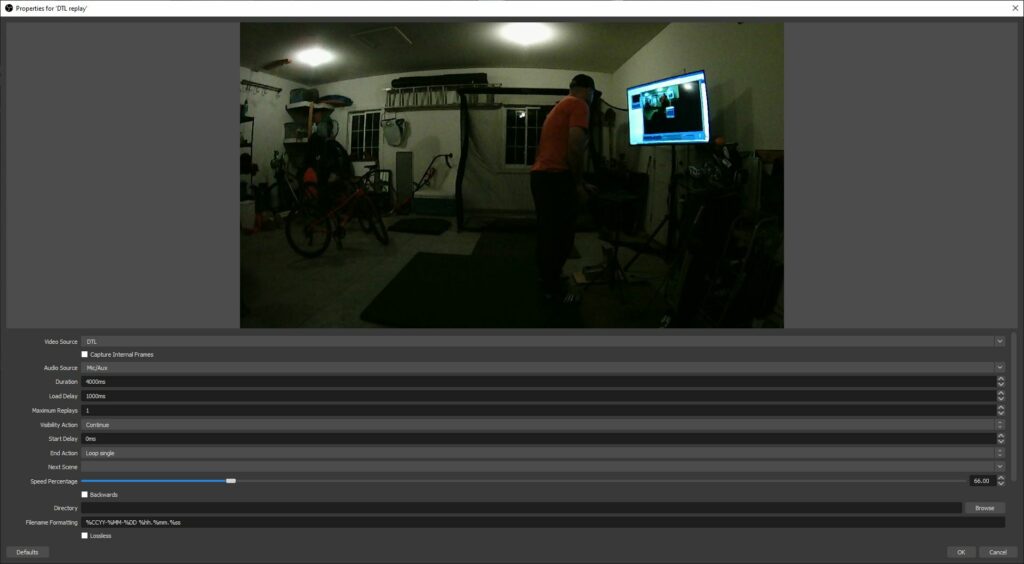
- Configure the replay source and click OK.
- Video Source – select the video input you configured above
- Audio Source – select the audio input you configure above
- Duration – set to the same value you set the video input duration to above (4000 ms)
- Load Delay – this controls the delay before the replay starts playing after its captured. I used 1000ms.
- Maximum Replays – set to 1 for infinite loop
- Visibility Action – Continue
- Start Delay – 0ms
- End Action – Loop single
- Next Scene – (blank)
- Speed Percentage – set to your desired replay speed. I used 60%.
- Backwards – Not Checked
- Directory – (blank)
- Filename Formatting – whatever you want
- Lossless – Unchecked
- Progress Crop Source – (blank)
- Text Source – (blank)
- Sound Trigger Load Replay – Checked
- Threshold db – match value configured above (-11 db)
- Load Replay Switch Scene – (blank)
- Load Replay – click the button to load the replay window so you can set it up in the scene prior to triggering the audio level
- The replay window should now show up in the scene. You can drag and resize it where you want.
- Close OBS and then reopen. OBS needed to be closed and reopened for the sound triggering settings to take effect.
- Test the settings
- Hit a ball to see if everything works. If it does not work, check your audio input and make sure that the audio sound bar is passing the decibel level you set as a trigger when you hit the ball.
- Repeat the above steps to add another video input and replay source if you have multiple cameras you want to use.
- You can add other window captures to add in the driving range, course, launch monitor data, etc.
Below is a quick example that I put together using 2 cameras, 2 replays, and the GSPro driving range.
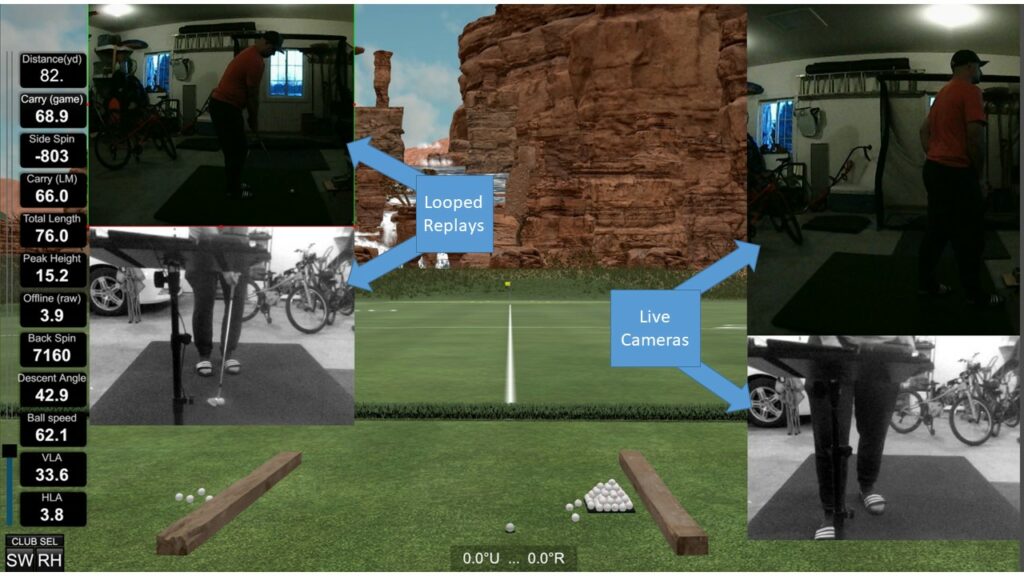
If using 2 different cameras, they may not be in sync with each other. If this is the case, you will need to try to align them through trial-and-error by adjusting the replay source start delay on the source that starts easly.